
Why Organic Microgreens Home Production Is Worth Starting Today
Organic microgreens home production is one of the fastest, most affordable ways to add nutrient-dense greens to your diet — no garden, no experience, and no expensive equipment required.
Here’s the short answer if you’re in a hurry:
- What you need: shallow trays, organic untreated seeds, a growing medium (soil or coco coir), a spray bottle, and a light source
- How long it takes: 7–14 days from seed to harvest for most varieties
- What it costs: as little as 49 cents per day for a steady daily supply
- Where to grow: a sunny windowsill or under a basic LED grow light
That’s really it. You can have fresh, living greens on your kitchen counter in under two weeks.
Store-bought microgreens can cost anywhere from $5 to $10 per tray. Growing your own at home slashes that cost dramatically — a single 25g pack of seeds can yield several cups of microgreens daily for under a dollar a day.
And the nutrition payoff is real. Research shows microgreens can contain up to 40 times more vitamins and antioxidants than their fully grown counterparts. You’re eating the plant at its most concentrated stage — before all those stored nutrients spread out across roots, stems, and leaves.
The best part? You don’t need to be a gardener. Microgreens are arguably the most beginner-friendly crop you can grow indoors, year-round, in less than one square foot of space.
This guide walks you through everything — from picking your first seeds to troubleshooting mold — so you can grow confidently from day one.
Understanding Organic Microgreens Home Production
At its core, organic microgreens home production is the practice of harvesting edible vegetables and herbs during their “toddler” phase. These aren’t just tiny plants; they are biological powerhouses.
When we talk about microgreens, we are referring to the stage after germination when the first set of leaves, known as cotyledons, have fully developed. If you wait longer, they become baby greens. If you harvest them before they even hit the soil, they are sprouts.
We love microgreens because they offer a sophisticated flavor profile—ranging from the spicy kick of a radish to the nutty crunch of a sunflower—without the bitterness sometimes found in mature plants. For a deep dive into the basics, check out our Microgreens 101: A Beginners Guide.
The Nutritional Powerhouse Advantage
Why are these tiny leaves so hyped? It comes down to phytonutrients. In the early stages of a plant’s life, all the energy and nutrients required to grow a massive vegetable are concentrated in a tiny package.
According to Scientific research on microgreen nutrient density, these seedlings can contain significantly higher concentrations of Vitamins C, E, and K, as well as beta-carotene, compared to mature leaves. For example, red cabbage microgreens have been found to have 40 times more vitamin E and 6 times more vitamin C than mature red cabbage.
Eating these daily is like taking a high-potency, whole-food multivitamin. If you want to see how this impacts your health specifically, read our guide on How microgreens improve nutrition.
Microgreens vs. Sprouts: Key Differences
We often see people confuse these two, but they are quite different in how they grow and their food safety profile.
- Growing Medium: Sprouts are grown in water (usually in a jar), while microgreens are grown in a medium like soil or coco coir.
- Light: Sprouts don’t need light; they are often grown in the dark. Microgreens need light to develop those vibrant green leaves and phytonutrients.
- Parts Eaten: With sprouts, you eat the whole thing—root, seed, and stem. With microgreens, we snip them above the soil line, eating only the stem and leaves.
- Safety: Because sprouts grow in warm, wet conditions without airflow, they have a higher risk of bacterial contamination. Microgreens, grown in soil with better ventilation, are generally considered safer.
For more on the germination side of things, see our article Demystifying the sprouting process for microgreens.
Essential Supplies for a Budget-Friendly Setup
You don’t need a high-tech laboratory to succeed with organic microgreens home production. In fact, we recommend starting with repurposed household items to keep your “start-up” costs low.
Here is your essential checklist:
- Trays: You can buy professional 1020 trays, but Trays (pizza dough box) work exceptionally well because they are durable and food-safe. Ensure they have drainage holes (you can poke these yourself).
- Spray Bottle: A simple Sprayer is vital for the early days when seeds need gentle moisture.
- Water: Purified or filtered water is best, especially if your tap water is heavily chlorinated.
For a full breakdown of the gear we use, visit our Beginners Guide to Microgreens Garden Setup.
Selecting Seeds for Organic Microgreens Home Production
This is the most important step. Because you are eating the plant so early in its life cycle, you must use seeds that are organic, non-GMO, and untreated. Commercial seeds meant for full-sized gardens are often treated with fungicides or dyes that you do not want to ingest.
We recommend starting with Broccoli seeds because they are incredibly forgiving and grow quickly. Other great starters include radish, kale, and arugula. For a curated list, see our Top Microgreens Seeds for Home Gardening.
Choosing the Best Growing Medium
While you can grow microgreens hydroponically, we find that beginners have the most success with a solid medium.
- Organic Potting Soil: Look for a fine-textured seed-starting mix. Avoid “garden soil,” which is too heavy and might contain pests.
- Coconut Coir: A sustainable alternative made from coconut husks. It holds moisture well and is very clean.
- Mats: For a mess-free experience, Coco mats are excellent, especially for smaller seeds.
Learn more about your options in our guide to Soil and Growing Medium for Microgreens.
Step-by-Step Guide to Planting and Care
Ready to get your hands dirty? Follow this process to ensure a bountiful harvest. For a more detailed walkthrough, check out The Ultimate Step-by-Step Guide to Growing Microgreens Without Killing Them.
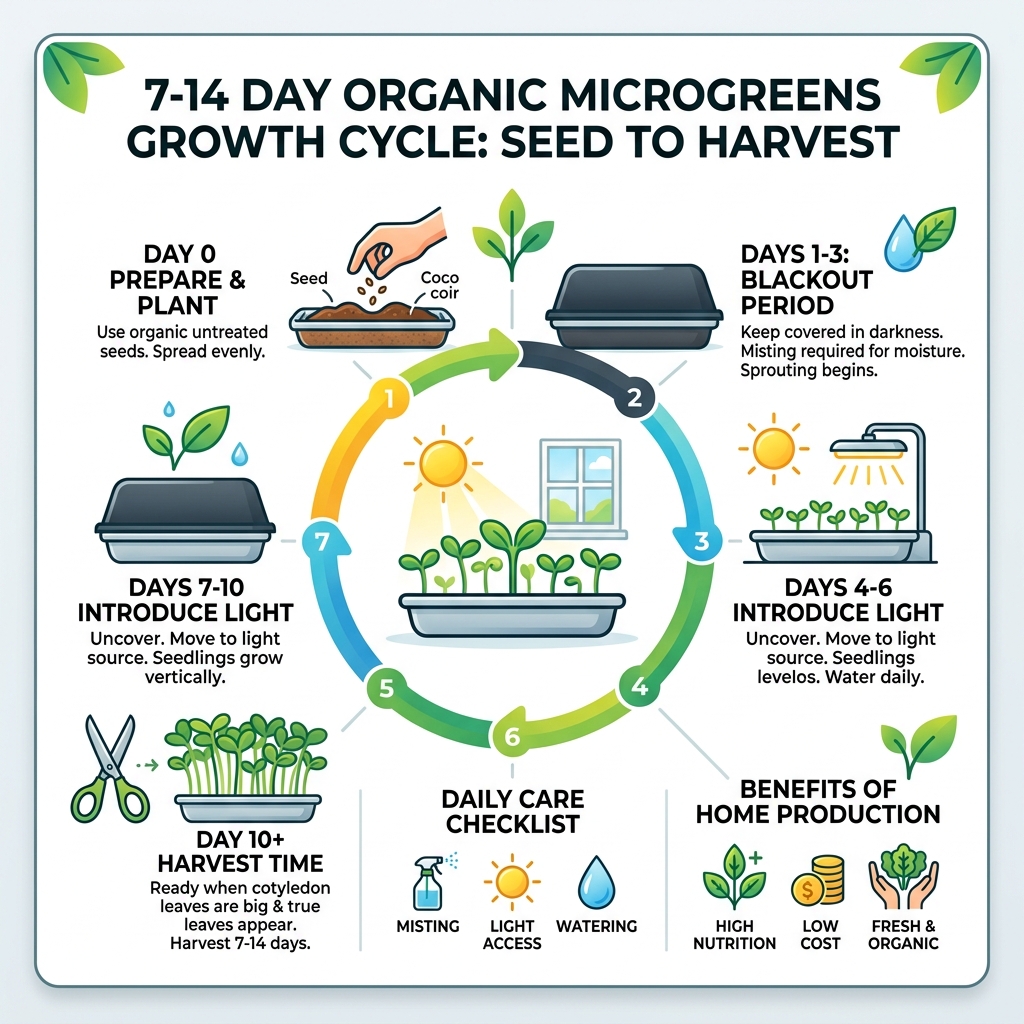
- Prepare the Tray: Fill your tray with about 1 to 2 inches of your chosen medium. Level it out with your hand or a small board, but don’t pack it down too hard.
- Moisten the Medium: Use your spray bottle to dampen the soil. It should be moist like a wrung-out sponge, not soaking wet.
- Sow the Seeds: This is where microgreens differ from traditional gardening. You want to sow densely. Think of it like sprinkling salt on a steak—you want an even “blanket” of seeds across the surface. For small seeds (like broccoli), aim for about 10-12 seeds per square inch.
- Mist Again: Give the seeds a final misting to ensure they have good contact with the moisture.
- Watering Strategy: Once the plants are established (after the blackout phase), switch to bottom watering. Place your growing tray inside another tray filled with an inch of water. This keeps the leaves dry and prevents mold. Read more about The Right Way to Water Your Microgreens.
Mastering the Blackout Phase for Organic Microgreens Home Production
The “Blackout Phase” is the secret sauce of professional-looking microgreens. After sowing, cover your tray with another tray or Styrofoam covers for trays to block out all light.
Why do we do this?
- Humidity: It keeps the moisture locked in during the critical germination period.
- Stretch: In total darkness, the seedlings will “stretch” upward looking for light. This creates the long, elegant stems that are easy to harvest.
- Uniformity: It ensures all seeds germinate at roughly the same time.
Some growers even place a weight (like a brick or a heavy book) on top of the cover. This forces the roots to push deeper into the medium and results in stronger stems. Keep them in the dark for 3-5 days until they are about an inch tall. Discover more Secrets for Healthy Microgreen Growth.
Lighting and Temperature Management
Once you remove the cover, your microgreens will look yellow and a bit sad. Don’t panic! Once they hit the light, photosynthesis kicks in, and they’ll turn vibrant green within hours.
- Natural Light: A south-facing windowsill is ideal. They need at least 4-6 hours of direct sunlight.
- Artificial Light: If you don’t have a sunny window, LED lights to use for growing are a game changer. They are energy-efficient and provide the “cool spectrum” light that prevents the plants from getting too “leggy.” Aim for 12-16 hours of light per day.
- Temperature: Most varieties thrive between 65°F and 75°F (18°C-24°C). If it’s too cold, they grow slowly; too hot, and you risk mold.
For more technical details, see the University of Minnesota’s guide on Lighting for indoor plants and starting seeds or our own tips on Maintaining Optimum Temperatures for Your Microgreens.
Harvesting, Storage, and Troubleshooting
The finish line is in sight! Generally, microgreens are ready when they are 2 to 3 inches tall and have their first set of “true leaves” (the leaves that appear after the initial cotyledons).
When to Harvest for Peak Nutrition
Timing is everything. If you harvest too early, you lose out on yield. If you wait too long, the stems can become woody and the flavor can turn bitter.
- Radish: 6–8 days
- Broccoli: 7–10 days
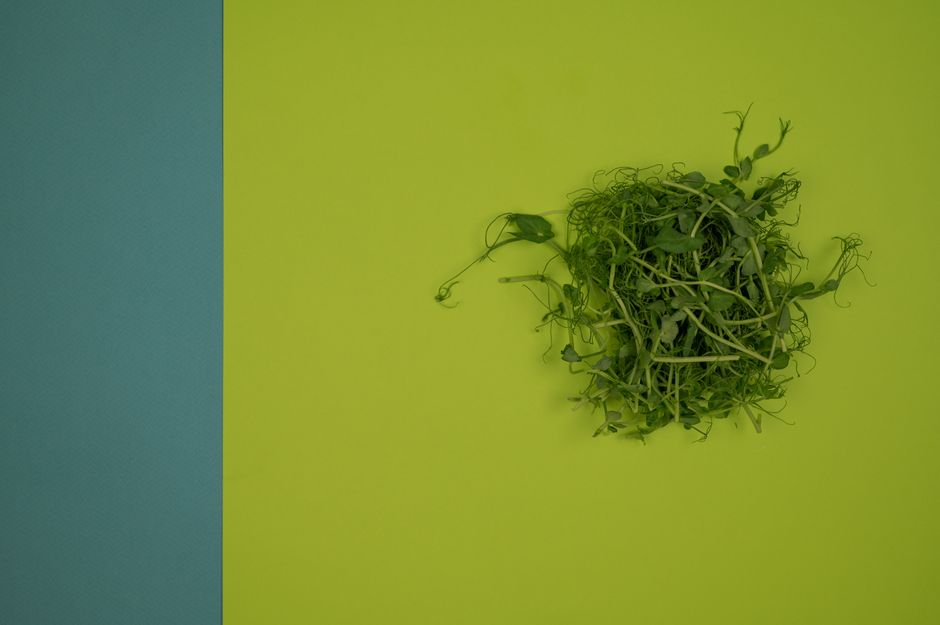
- Pea Shoots: 10–14 days
- Sunflower: 12–14 days
To harvest, use clean scissors or a sharp knife to snip the greens about half an inch above the soil. For a variety-specific guide, check The Ultimate Cheat Sheet for Every Type of Microgreen and our Proper Techniques for Harvesting Microgreens.
Solving Common Growing Problems
Even experts run into trouble. Here’s how to fix the “Big Three” issues:
- Mold: This is the most common problem in organic microgreens home production. It usually looks like white spiderwebs. To prevent it, increase airflow (use a small fan) and switch to bottom watering. Don’t confuse mold with “root hairs,” which are tiny, fuzzy white structures that are a healthy part of the root. If you’re unsure, see How to Avoid Mold in Your Microgreen Garden.
- Leggy Growth: If your plants are very tall, thin, and falling over, they are “searching” for light. Move them to a sunnier spot or lower your LED grow lights.
- Yellowing: This usually means they need more light or they have been in the tray too long and have exhausted the nutrients in the seed.
Check out our list of Tools to Prevent Mold in Microgreens and learn to Avoid These Common Microgreen Growing Mistakes.
The Economics of Homegrown Superfoods
At FinanceOrbitX, we love a good ROI (Return on Investment). Organic microgreens home production isn’t just a hobby; it’s a savvy financial move for your grocery budget.
| Expense Item | Store-Bought (Per Month) | Homegrown (Per Month) |
|---|---|---|
| Cost per Tray | $8.00 | $0.50 |
| Total Monthly Cost | $32.00 (4 trays) | $2.00 |
| Annual Savings | $384.00 | $360.00 Saved! |
Note: Initial setup costs for trays and lights are not included but typically pay for themselves within the first 2-3 months.
Beyond the cash, you are saving on “food miles” and plastic waste. To maximize your output, follow our Year-Round Indoor Microgreen Growing Tips and consult our Microgreens Health Benefits Guide to see why this investment is worth every penny.
Frequently Asked Questions about Organic Microgreens
Can microgreens regrow after the first harvest?
For 90% of varieties, the answer is no. Because you are cutting the plant below its growth point, it cannot recover. However, pea shoots and wheatgrass are the exceptions; they can often provide a second, slightly smaller harvest if you leave at least one leaf on the stem.
Is it safe to grow microgreens without soil?
Absolutely. Many people use hemp mats, coco coir, or even recycled paper towels. The key is ensuring the medium stays moist but doesn’t become a breeding ground for bacteria. Soil-free methods are often “cleaner” for kitchen counter growing.
How long can I store harvested microgreens in the fridge?
If you store them properly—unwashed, in an airtight container with a dry paper towel to absorb excess moisture—they can last 5 to 10 days. However, for peak nutrition, we recommend eating them immediately after harvest.
Conclusion
Starting your journey into organic microgreens home production is a small step that leads to massive health and financial benefits. By taking control of your food supply on a micro-scale, you’re ensuring that the greens on your plate are as fresh, nutrient-dense, and chemical-free as possible.
At FinanceOrbitX, we believe that sustainable living should be accessible to everyone, regardless of their budget or living situation. Whether you have a sprawling kitchen or a tiny studio apartment, there is room for a tray of life-giving greens.
Ready to start your first tray? Revisit our Microgreens Health Benefits Guide for that final bit of inspiration, and happy growing!
