
Why High Yield Microgreens Varieties Are Worth Growing
High yield microgreens varieties are the fastest way to get more food from less space — and if you’re just starting out, knowing which ones to grow first makes all the difference.
Here are the top high-yield varieties to start with:
| Variety | Seeding Rate (1020 tray) | Days to Harvest | Yield Highlight |
|---|---|---|---|
| Pea Shoots | 180–275g | 10–14 days | Massive bulk; regrows for a second cut |
| Sunflower | 100–150g | 8–12 days | Heavy, filling greens with nutty flavor |
| Radish | 35–45g | 6–8 days | Fastest turnaround of any variety |
| Broccoli | 30–35g | 7–10 days | Reliable, high-germination producer |
| Wheatgrass | 450g | 8–10 days | Highest seeding density, maximum mass |
Most microgreens are ready to harvest in under two weeks. That’s remarkably fast compared to any other food crop you can grow at home.
But not all varieties are equal. Some fill a tray with dense, heavy greens. Others grow quickly but produce thin, wispy shoots. Choosing the wrong ones early on is one of the most common beginner mistakes.
The good news? A handful of proven varieties consistently outperform the rest — whether you’re growing on a kitchen counter or scaling up to a full rack setup. This guide walks you through exactly which ones to prioritize, how much to seed, and what to expect at harvest.

The Best High Yield Microgreens Varieties for Maximum Output
When we talk about “high yield,” we aren’t just talking about how tall a plant grows. We are looking at biomass—the actual weight of the food you harvest from a single 1020 tray (the standard 10-inch by 20-inch growing tray). For those of us looking to maximize our “return on investment” (both in time and seed cost), selecting the right high yield microgreens varieties is like picking a high-performing stock for your garden portfolio.
Biomass is influenced by several factors: seed size, germination rate, and how densely we can pack the tray without causing mold. Some varieties, like the Brassicaceae family, are legendary for their reliability and nutrient density. In fact, scientific research on Brassicaceae microgreens highlights how these tiny plants pack a massive phytochemical punch compared to their mature counterparts.
To get the most out of your shelf space, we recommend focusing on crops that offer substantial “bulk.” If you want to feel like a microgreen mogul, these are the heavy hitters that will fill your harvest bowls to the brim.
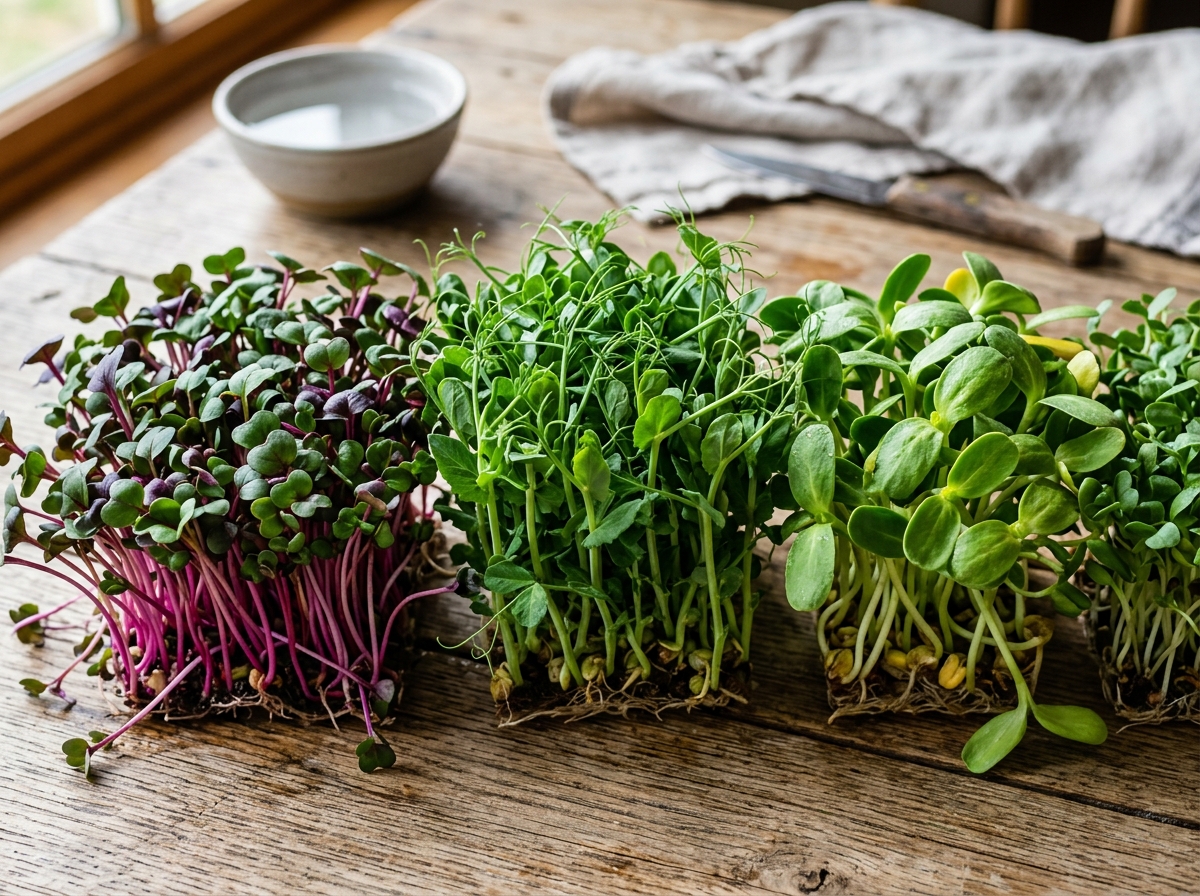
Pea Shoots: The Volume King (High Yield Microgreens Varieties)
If there were a hall of fame for high yield microgreens varieties, Pea Shoots would be front and center. Often called the “Volume King,” pea shoots produce thick, succulent stems and leafy tendrils that add significant weight to your harvest.
We typically use varieties like Dunn Pea, Speckled Pea, or Afilla (the one with the extra curly tendrils). To hit those pro-level yields, we recommend a heavy seeding rate of 180g to 275g of dry seed per 1020 tray. Because the seeds are large, they need a good 12–24 hour soak in cold water before planting.
Peas take about 10–14 days to reach peak harvest. But here is the “finance” tip of the gardening world: if you cut your pea shoots about an inch above the soil line, they can actually regrow! This second harvest usually arrives 5–7 days later, effectively doubling your yield from a single tray of soil. To dive deeper into which seeds are perfect for your setup, check out our guide on the best seeds for home gardening.
Sunflower Shoots: The Heavyweight Champion
Sunflower microgreens (specifically the Black Oil variety) are the “Heavyweight Champions” of the grow room. They are thick, crunchy, and surprisingly heavy. When you pick up a harvested handful of sunflower shoots, you can feel the density that other greens just don’t have.
We suggest a seeding rate of 100g to 150g per 1020 tray. Like peas, these need a soak (about 8–12 hours) to jumpstart germination. They take 8–12 days to harvest. One unique thing about sunflowers is that they require a bit of “tough love”—placing a 10lb weight on top of the tray during the first few days of growth helps them shed their hulls and grow stronger, thicker stems.
The result is a substantial bulk that tastes like nutty, fresh sunflower seeds. If you want a full list of how these compare to other types, we’ve put together the ultimate cheat sheet for every type of microgreen to help you keep track.
Radish: The Speed Demon (High Yield Microgreens Varieties)
If you value “tray throughput”—the speed at which you can move a tray from seed to harvest—Radish is your best friend. It is the “Speed Demon” of high yield microgreens varieties. While other crops are still thinking about sprouting, radish is already hitting the finish line.
Varieties like ‘Red Rambo’ or ‘Daikon’ are incredibly popular because they are nearly foolproof. With a seeding rate of 35g to 45g, you can expect a full harvest in just 6–8 days. That means you can grow nearly two crops of radish in the time it takes to grow one crop of beets or cilantro.
Radish doesn’t just grow fast; it grows tall and sturdy, filling the tray with vibrant colors and a spicy kick. For those of us who are a bit impatient (we’ve all been there!), radish provides that instant gratification. You can learn more about these and other fastest growing microgreens to try at home on our blog.
Broccoli and Brassicas: The Reliable Producers
Broccoli is the reliable “blue-chip” variety of the microgreen world. It’s consistent, easy to grow, and packed with health benefits like sulforaphane. We often use the ‘Waltham-29’ variety because it produces larger leaves and a more robust yield than other cultivars.
With a seeding rate of 30g to 35g per 1020 tray, broccoli is ready in 7–10 days. It has an incredibly high germination rate, meaning almost every seed you sow turns into a plant. This efficiency is why broccoli, cabbage, and kohlrabi are staples in commercial “Nutrition Mixes.”
Beyond the yield, the health stats are what really sell these. If you’re curious about the specific nutrient density of what you’re growing, take a look at our breakdown of vitamins in popular microgreens.
Maximizing Yield: Seeding Rates and Growth Cycles
To truly master high yield microgreens varieties, you have to treat your grow room like a well-oiled machine. This means precision. If you under-seed, you waste space and light. If you over-seed, you risk mold and “damping off” (where the stems rot at the base).
Below is a quick reference table to help you dial in your production:
| Variety | Seeding Rate (Dry) | Blackout Time | Total Days to Harvest | Avg. Yield (Grams) |
|---|---|---|---|---|
| Pea Shoots | 200g | 3-4 Days | 10-14 Days | 450g – 600g |
| Sunflower | 125g | 3-4 Days | 8-12 Days | 500g – 700g |
| Radish | 40g | 2-3 Days | 6-8 Days | 350g – 450g |
| Broccoli | 33g | 2-3 Days | 8-10 Days | 300g – 400g |
| Wheatgrass | 450g | 2-3 Days | 8-10 Days | 800g – 1000g |
| Buckwheat | 100g | 2-3 Days | 8-12 Days | 300g – 400g |
Optimizing the Blackout Phase
The “Blackout Phase” is the secret weapon for increasing yield. This is the period right after germination where we keep the seeds in total darkness—and often under weight.
Why do we do this? It forces the stems to stretch (elongate) as they search for light. For a microgreen grower, longer stems mean more weight and an easier time harvesting with scissors. By stacking trays on top of each other, we create a humid, weighted environment that ensures uniform growth across the entire tray.
For high-yield crops like sunflower and pea, we recommend keeping them under a 10lb weight for 3–4 days. This doesn’t just help with height; it actually makes the plants stronger. Just keep an eye on your humidity—too much trapped moisture during blackout can lead to mold issues.
Seeding Density for High-Volume Crops
Getting your seeding density right is a bit like finding the perfect balance in a financial portfolio. You want enough seeds to maximize the “return” (yield), but not so many that the “risk” (mold) takes over.
For small seeds like broccoli or cabbage, we aim for 10–12 seeds per square inch. For larger seeds like peas or sunflowers, 6–8 seeds per square inch is usually the sweet spot. We always recommend weighing your seed before sowing rather than “eyeballing” it. This ensures that every tray is consistent and your yields remain predictable. If you’re looking for more tips for your first tray, check out our easy-to-grow microgreens for your kitchen garden.
Commercial vs. Home Growing: Choosing Your High-Yield Strategy
Whether you are growing for your family or looking to start a small side hustle, your strategy for high yield microgreens varieties will change based on your goals.
For home growers, yield is often about efficiency—getting enough greens for a week’s worth of salads from a single tray. For commercial growers, yield is directly tied to profit margins. Every extra gram of weight per tray is “found money.”
High-Yield Mixes vs. Single Varieties
One of the best ways to boost your overall production is by using mixes. We love the “Nutrition Mix” (typically broccoli, cabbage, and kohlrabi) because all the components grow at the same speed. This allows you to harvest an entire tray of diverse greens at once.
Another favorite is the “Spicy Mix,” which adds radish and mustard to the base. Radish is a great “filler” because it grows so fast and adds significant bulk to the mix. From a market demand perspective, mixes often sell better than single varieties because they offer a complete flavor profile in one package.
Research shows that these mixes aren’t just tasty; they are nutritional powerhouses. You can read more about the research on microgreen vitamin concentrations to see why these blends are so popular in both high-end restaurants and home kitchens.
Scaling Production with Fast-Cycle Crops
If we want to scale our production, we focus on “tray throughput.” This is where the 6-day radish and the 8-day broccoli shine. By focusing on fast-cycle crops, we can use the same shelf space to produce 3 or 4 harvests in a single month.
This labor efficiency is key. It takes roughly the same amount of time to seed a tray of slow-growing cilantro (which can take 21 days) as it does a tray of fast-growing radish. By choosing high yield microgreens varieties with fast cycles, we maximize the productivity of our time and our equipment. If you’re ready to start scaling, we recommend looking into microgreens seed starter packs that bundle these high-performers together.
Common Mistakes That Reduce Microgreen Yields
Even with the best high yield microgreens varieties, things can go wrong. We’ve seen it all—from the dreaded “damping off” to trays that look like they’ve been through a drought.
The biggest yield-killers are:
- Overwatering: This is the #1 mistake. If the soil is soggy, the roots can’t breathe, and mold will take over.
- Poor Airflow: Without a small fan to move the air, humidity gets trapped between the stems, leading to rot.
- Low-Quality Seeds: If your germination rate is only 50%, your yield is automatically cut in half. Always buy high-quality, high-germination seeds.
To keep your plants healthy and full of life, check out our guide on antioxidant-rich microgreens to grow.
Managing Humidity and Damping Off
To maximize your yield, you have to manage the “micro-climate” of your grow room. We use horizontal airflow (HAF)—basically just small fans—to keep the air moving around the trays. This strengthens the stems and prevents moisture from sitting on the leaves.
Another pro tip is “bottom watering.” Instead of spraying the greens from the top (which can encourage mold), we pour water into the bottom tray and let the soil wick it up. This keeps the foliage dry and the roots happy. If you are growing microgreens as part of a health journey, you might also find our article on the best microgreens for weight loss useful, as healthy crops provide the best nutritional support.
Frequently Asked Questions about High Yield Microgreens
Which microgreen has the highest yield per tray?
In terms of raw weight, Wheatgrass often takes the top spot because of its incredibly high seeding density (up to 450g per tray). However, for edible culinary greens, Pea Shoots and Sunflower Shoots are the undisputed champions, consistently yielding 500g to 700g per 1020 tray.
How can I increase the weight of my microgreen harvest?
There are three main ways:
- Increase Seeding Density: Carefully push the limits of how many seeds you can fit without causing mold.
- Extend the Blackout: A longer blackout (with weight) creates longer, heavier stems.
- Harvest Later: Waiting until the first “true leaves” appear (instead of just the cotyledons) can significantly increase the total biomass of the tray.
Do high-yield varieties require more nutrients?
Most microgreens get all the nutrients they need from the seed itself and the growing medium (soil or coco coir). However, for longer-cycle crops like pea shoots or if you are going for a “second cut,” a very dilute, organic liquid fertilizer can help maintain vigor and weight.
Conclusion
At FinanceOrbitX, we believe that gardening should be as rewarding as a well-managed portfolio. By focusing on high yield microgreens varieties like pea shoots, sunflowers, and radishes, you are setting yourself up for maximum production with minimum waste.
Whether you are looking to boost your home nutrition or build a small-scale commercial operation, these varieties offer the best “return on effort” in the horticultural world. Start with the basics, master your seeding rates, and don’t be afraid to experiment with mixes to find what works best for your space.
Ready to get growing? Check out The Ultimate Guide to Growing Microgreens at Home for a step-by-step walkthrough of your first harvest. Happy growing!
