
Fresh Flavor in Weeks: What You Need to Know About Basil Microgreens Quick Harvest
Basil microgreens quick harvest is absolutely achievable at home — and it’s simpler than most beginners expect.
Here’s the short answer if you’re in a hurry:
How fast can you harvest basil microgreens?
| Method | Germination | Ready to Harvest |
|---|---|---|
| Optimal conditions (heat mat, grow light) | 2-3 days | 14-20 days |
| Standard indoor setup | 3-5 days | 20-25 days |
| Weighted blackout method | 5-6 days blackout | 24-30 days |
| Ideal harvest day | – | ~22 days |
Key tips for the fastest harvest:
- Use Genovese basil seeds (fastest, most flavorful variety)
- Keep temperature at 75°F using a heat mat
- Provide 12-14 hours of light daily after germination
- Use the weighted blackout method for stronger, sturdier plants
- Harvest when seedlings reach 2-3 inches tall with first true leaves
Just imagine a steaming dish of lasagna topped with crunchy, fragrant basil. That flavor comes from your own windowsill — in about three weeks.
Basil microgreens are the tiny, immature seedlings of the basil plant, harvested just a few weeks after sowing. They pack over three times the nutrients of mature basil and deliver a stronger, slightly sweeter flavor in a tender, bite-sized form.
The catch? Basil is one of the slower microgreens to grow. Unlike radish or pea shoots (ready in 7-10 days), basil needs 14-25 days depending on your setup. But with the right steps, you can push toward that faster end of the window — and enjoy a staggered harvest that keeps giving over several days.
This guide walks you through everything: supplies, planting, germination tricks, and harvesting — so your first tray goes smoothly.
Essential Supplies for a Basil Microgreens Quick Harvest
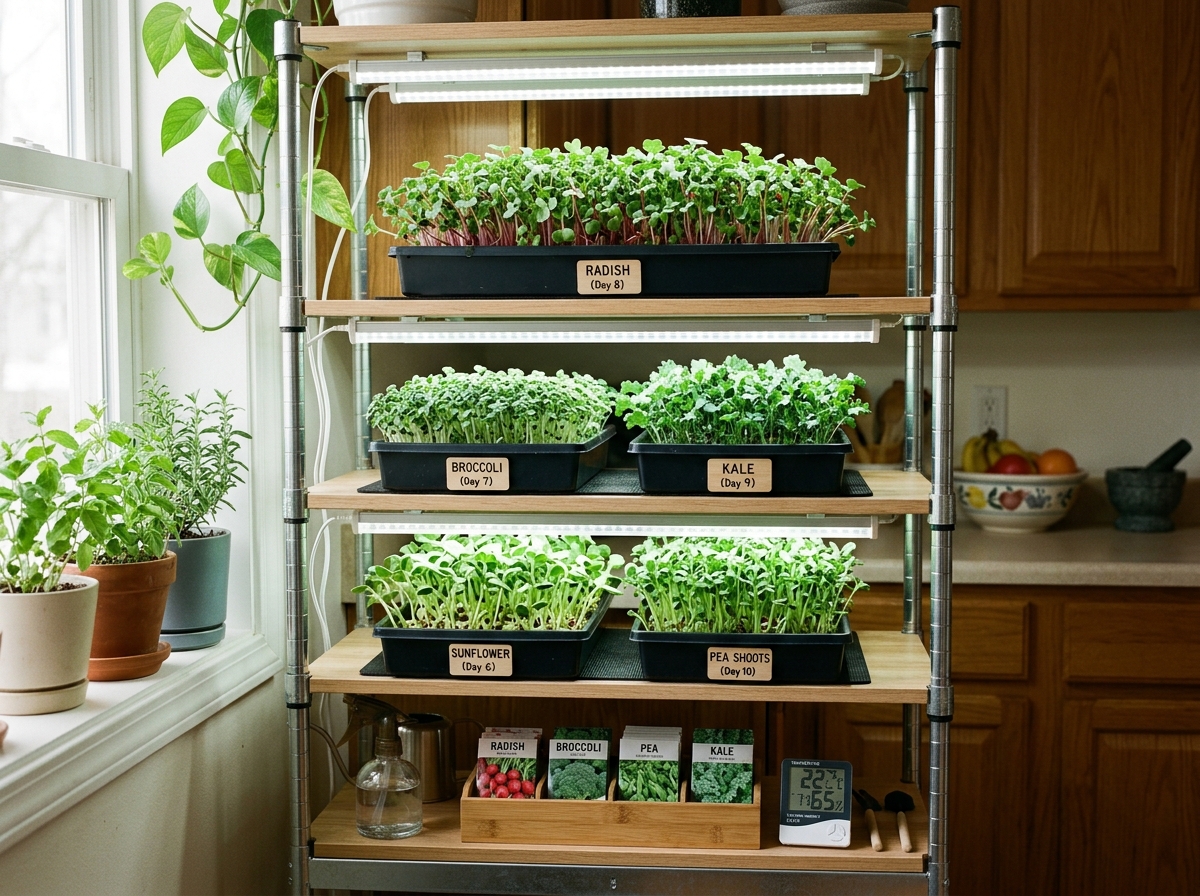
Before you plant a single seed, it helps to have the right tools ready. Think of this as your startup investment — and if there’s one thing we love at FinanceOrbitX, it’s a setup that pays off fast. The good news? You don’t need much to get started.
The Seed Selection
Your variety choice matters more than you might think. Genovese (Sweet) Basil is the gold standard for microgreens — it’s reliable, fast-growing, and tastes like everything good about Italian cooking. If you want something a little different, Thai Basil brings a subtle anise flavor that works beautifully in spicy or Asian-inspired dishes. Purple Petra adds a dramatic pop of color to your plate, though purple varieties can grow slightly slower than green ones. Lemon or Lime Basil is worth trying too, especially if you enjoy cooking fish or fresh summer salads.
For a deeper look at which variety might suit your cooking style best, The Gourmet Guide to Different Types of Micro Herbs is a great place to start.
The Growing Medium
Basil seeds are mucilaginous — meaning they get a little gel-like when wet (more on that later). Because of this, your growing medium needs to stay consistently moist without becoming waterlogged.
Coco coir is an excellent choice. It’s pH-neutral (usually between 5.8 and 6.2), drains well, and gives roots plenty of room to breathe. If you prefer soil, use a sterile seed-starting mix. Avoid garden soil — it can carry fungi that cause damping-off, a fast-moving disease that can wipe out a whole tray overnight.
Trays and Lighting
You’ll need two standard 10×20 trays — one with drainage holes (for the seeds) and one solid tray underneath (for bottom watering). These are the industry standard for a reason: they’re the right depth, easy to stack, and simple to clean. In a pinch, shallow recycled containers work too, as long as they’re clean and about two inches deep.
For lighting, a bright south-facing window can work, but it’s not ideal for a basil microgreens quick harvest. Basil seedlings that don’t get enough light stretch upward and become tall, thin, and weak — a problem called “legginess.” LED grow lights solve this completely. They deliver consistent, full-spectrum light and keep your seedlings compact and strong.
The Speed Boosters
A few extra items make a real difference in how quickly your tray comes together. A heat mat set to 75°F is probably the single biggest upgrade you can make — basil loves warmth, and consistent heat noticeably speeds up germination. A misting bottle is essential for the first few days when seeds need gentle, even moisture. And if your tap water is heavily chlorinated, either let it sit uncovered for 24 hours or run it through a filter — basil prefers pH-neutral water and doesn’t love a heavy chemical load.
That’s really all you need. A modest upfront investment, and you’re set up for tray after tray of fresh, fragrant basil.
Step-by-Step Planting for the Fastest Growth
Now that we have our supplies, it’s time to plant. Growing basil microgreens is a bit like managing a high-growth portfolio; it requires precision at the start to ensure success at the finish.
- Prepare the Tray: Fill your tray with drainage holes with about 1 to 2 inches of your growing medium. Smooth it out so it’s level, but don’t pack it down too hard. You want the roots to be able to penetrate easily.
- Moisten the Surface: Mist the top of the soil until it’s damp like a wrung-out sponge.
- Seeding Density: This is crucial. You want a dense mat of greens, but not so crowded that they choke each other out. Aim for about 15 seeds per square inch, or roughly 2 tablespoons for a 10×20 tray. A seed shaker can help you get an even distribution.
- The “No Soak” Rule: Unlike some larger seeds, do not soak basil seeds. Basil seeds are mucilaginous, meaning they develop a slippery, gel-like coating the moment they touch water. If you soak them, you’ll end up with a clump of grey goo that is impossible to spread.
- Final Mist: Once the seeds are spread, give them one more light misting. You’ll see that milky white gel start to form—this is normal! It’s the seed’s way of holding onto moisture.
For a deeper dive into the mechanics of planting, see The Ultimate Step-by-Step Guide to Growing Microgreens Without Killing Them.
Using the Weighted Blackout Method for a Basil Microgreens Quick Harvest
If you want the sturdiest, most resilient basil, we recommend the weighted blackout method. This sounds intense, but it’s actually very simple.
Instead of covering your seeds with soil (which can be messy), you place a second tray (the one without holes) directly on top of the seeds. Then, you place a weight on that tray—anything from 2.5 to 10 lbs (like a brick or a large book).
Why do we do this?
- Root Anchoring: The weight forces the emerging roots to push downward into the soil with more vigor.
- Stem Strength: It creates sturdier stems that can support the leaves later.
- Uniformity: It ensures all seeds have good contact with the moist soil.
Keep the tray in total darkness for 5 to 6 days. Resist the urge to peek! This “struggle” under the weight actually prepares them for a faster growth spurt once they hit the light. If you’re looking for even faster options, check out The Fastest Growing Microgreens to Try at Home.
Optimizing Temperature and Light for a Basil Microgreens Quick Harvest
Once you remove the weight and the cover, your basil will look a bit pale and squashed. Don’t panic! Within a few hours of hitting the light, they will turn a vibrant green and stand tall.
To keep them on the fast track:
- Light Duration: Provide 12 to 14 hours of light daily. If you are using LEDs, keep them about 6 to 12 inches above the plants.
- Temperature: Maintain a steady 68–75°F. If your house is chilly (like 68°F), your harvest might take 25 days instead of 20.
- Bottom Watering: This is the secret to healthy microgreens. Instead of watering from above (which can lead to mold and “damping-off”), pour water into the bottom tray (the one without holes) and let the soil tray soak it up.
- Air Circulation: A small fan running on low for a few minutes every couple of hours can prevent stagnant air and strengthen the stems.
For more professional tips, explore How to Grow Microgreens at Home Like a Pro.
When and How to Harvest Your Micro Basil
Timing the harvest is where the “instant flavor boost” really happens. If you harvest too early, you miss out on yield; too late, and the stems become woody and the flavor changes.
The Stages of Growth
Basil microgreens go through two main edible stages:
- Cotyledon Stage: These are the first “seed leaves” that appear. They are smooth and heart-shaped. You can harvest now (around day 12-14), but the flavor is milder.
- First True Leaves: This is the “sweet spot” for a basil microgreens quick harvest. True leaves look like miniature versions of adult basil—wrinkly and ovular. Harvest when these appear and the plants are 2 to 3 inches tall (usually around day 20-22).
| Stage | Appearance | Flavor Profile | Best For |
|---|---|---|---|
| Cotyledon | Smooth, heart-shaped | Mild, tender | Garnishes, light salads |
| First True Leaves | Wrinkled, ovular | Intense, sweet | Pesto, pasta, pizza |
| Baby Leaf | Multiple leaf sets | Strong, slightly spicy | Sandwiches, cooking |
The Harvesting Technique
When you’re ready, grab a pair of very sharp, clean shears or a knife.
- The Cut: Hold a small bunch of greens gently and cut about 1/2 inch above the soil line.
- Cleanliness: Avoid getting soil on the leaves, as washing microgreens can shorten their shelf life and make them “mushy.”
For more details on identifying the perfect moment, see Knowing Exactly When Your Microgreens Are Ready and Proper Techniques for Harvesting Microgreens.
Post-Harvest Care and Succession Planting
You’ve done it! You have a pile of fresh, aromatic micro basil. But the work isn’t quite over if you want to maximize your “investment.”
Storage Tips
Microgreens are delicate. If you aren’t eating them immediately:
- Dry is Best: Never wash them before storing. If they are slightly damp from harvest, let them air dry on a paper towel first.
- The Container: Place them in an airtight container or a glass jar.
- The Paper Towel Trick: Place a dry paper towel at the bottom of the container to absorb any excess moisture.
- Refrigeration: Keep them in the coolest part of your fridge. Properly stored, they can last 5 to 7 days, though they are best consumed within 48 hours for peak nutrition.
For a masterclass in handling your bounty, check out Master the Art of the Microgreen Harvest Today.
Succession Planting for a Continuous Supply
One tray of basil is never enough. To ensure you always have a fresh supply, we recommend succession planting.
Since basil takes about 3 weeks to mature, sow a new, smaller container every 7 to 10 days. This staggered approach ensures that as you finish one harvest, the next tray is just a few days away from being ready. It’s the gardening equivalent of a steady dividend stream!
Frequently Asked Questions about Basil Microgreens
Do I need to soak basil seeds before planting?
Absolutely not! As we mentioned earlier, basil seeds are mucilaginous. When they get wet, they create a gooey, gelatinous outer layer. If you soak them in a bowl, they will stick together in a massive, unmanageable clump. Direct sowing onto moist soil is the only way to go.
Can I regrow basil microgreens after the first cut?
Unfortunately, no. Most microgreens, including basil, are single-use seedlings. They don’t have enough “meristematic tissue” (the plant version of stem cells) left at the base to regrow a second healthy crop. Once you cut them, it’s best to compost the remaining soil and roots and start fresh. Reusing the soil is also risky as it can harbor bacteria or fungi from the previous cycle.
Why are my basil microgreens growing so slowly?
If you’re past the 25-day mark and they still look tiny, check these three things:
- Temperature: Is it below 70°F? Basil is a tropical herb; it hates the cold. A heat mat is a game-changer here.
- Light: Are they leaning toward a window? They might not be getting enough “fuel” from the sun. Supplemental LED lights can speed things up significantly.
- Seed Age: Old seeds have lower germination rates and less energy. Try to use seeds within two years of purchase.
Conclusion
At FinanceOrbitX, we believe that growing your own food is one of the smartest investments you can make for your health and your palate. Achieving a basil microgreens quick harvest isn’t just about speed; it’s about the incredible flavor and nutrition you bring to your kitchen.
Whether you’re topping a steaming lasagna, enhancing a homemade pesto, or just looking for a fun indoor hobby, basil microgreens are a “blue-chip” choice for any home gardener. They are easy to grow, stunning to look at, and offer a culinary return that store-bought herbs simply can’t match.
Ready to expand your indoor estate? Explore More info about indoor gardening services and join our community of green-thumbed investors today. Happy growing!
